Connect over SSH and rsync through the bastion
Once port 22 is closed to the world, reach your servers with native SSH and rsync through the bastion — register a key, then add one jump flag to the commands you already use.
After you close the SSH port with a bastion, port 22 is
no longer open to the internet. Your day-to-day shell still works — the browser Terminal rides
the agent’s outbound connection and needs no inbound port. But native command-line tools (ssh,
rsync, scp, your IDE’s Remote SSH) reach the host over port 22, which is now closed to everyone
except the bastion.
The fix is small: keep using the exact commands you already know, and route them through the bastion
with one extra flag. The bastion is a tunnel-only jump host — it forwards the connection to your
server but never sees your host password or terminates your SSH. You log in to the host with your
own key or password, end to end. This guide shows the before/after for both ssh and rsync so you
can connect to your own servers on your own.
Before you start
- You’ve already restricted SSH to the bastion (or are about to). If port 22 is still open to the world, you don’t need the bastion yet — connect directly.
- You have a terminal with the OpenSSH client (
ssh, built into macOS, Linux, and Windows 10+).- Your deployment runs a bastion. If the Bastion keys page isn’t in your sidebar, ask your administrator.
The one rule that trips people up
When you connect through the bastion, the final destination must be your server’s IP address — not its hostname or FQDN.
The bastion only opens a tunnel to servers in your account, and it matches them by IP. If you
hand it a hostname like server.example.com, it has nothing to match against and refuses to open the
channel (administratively prohibited). Give it the IP and the tunnel opens.
You can find each server’s IP in the dashboard on the server’s overview header. Keep using port 22’s
normal target (root@…, your own user, etc.) — only the address changes from a name to an IP.
The jump host itself stays a name —
jump@b1.centralhost.sh. It’s the server behind it that must be addressed by IP.
Step 1 — Register a bastion key
The bastion is key-only — it never accepts a password for the jump itself, even if your server uses password login. So before anything else, register the public half of an SSH key. This is the key that gets you to the bastion; logging in to the server behind it is separate (your own key or password).
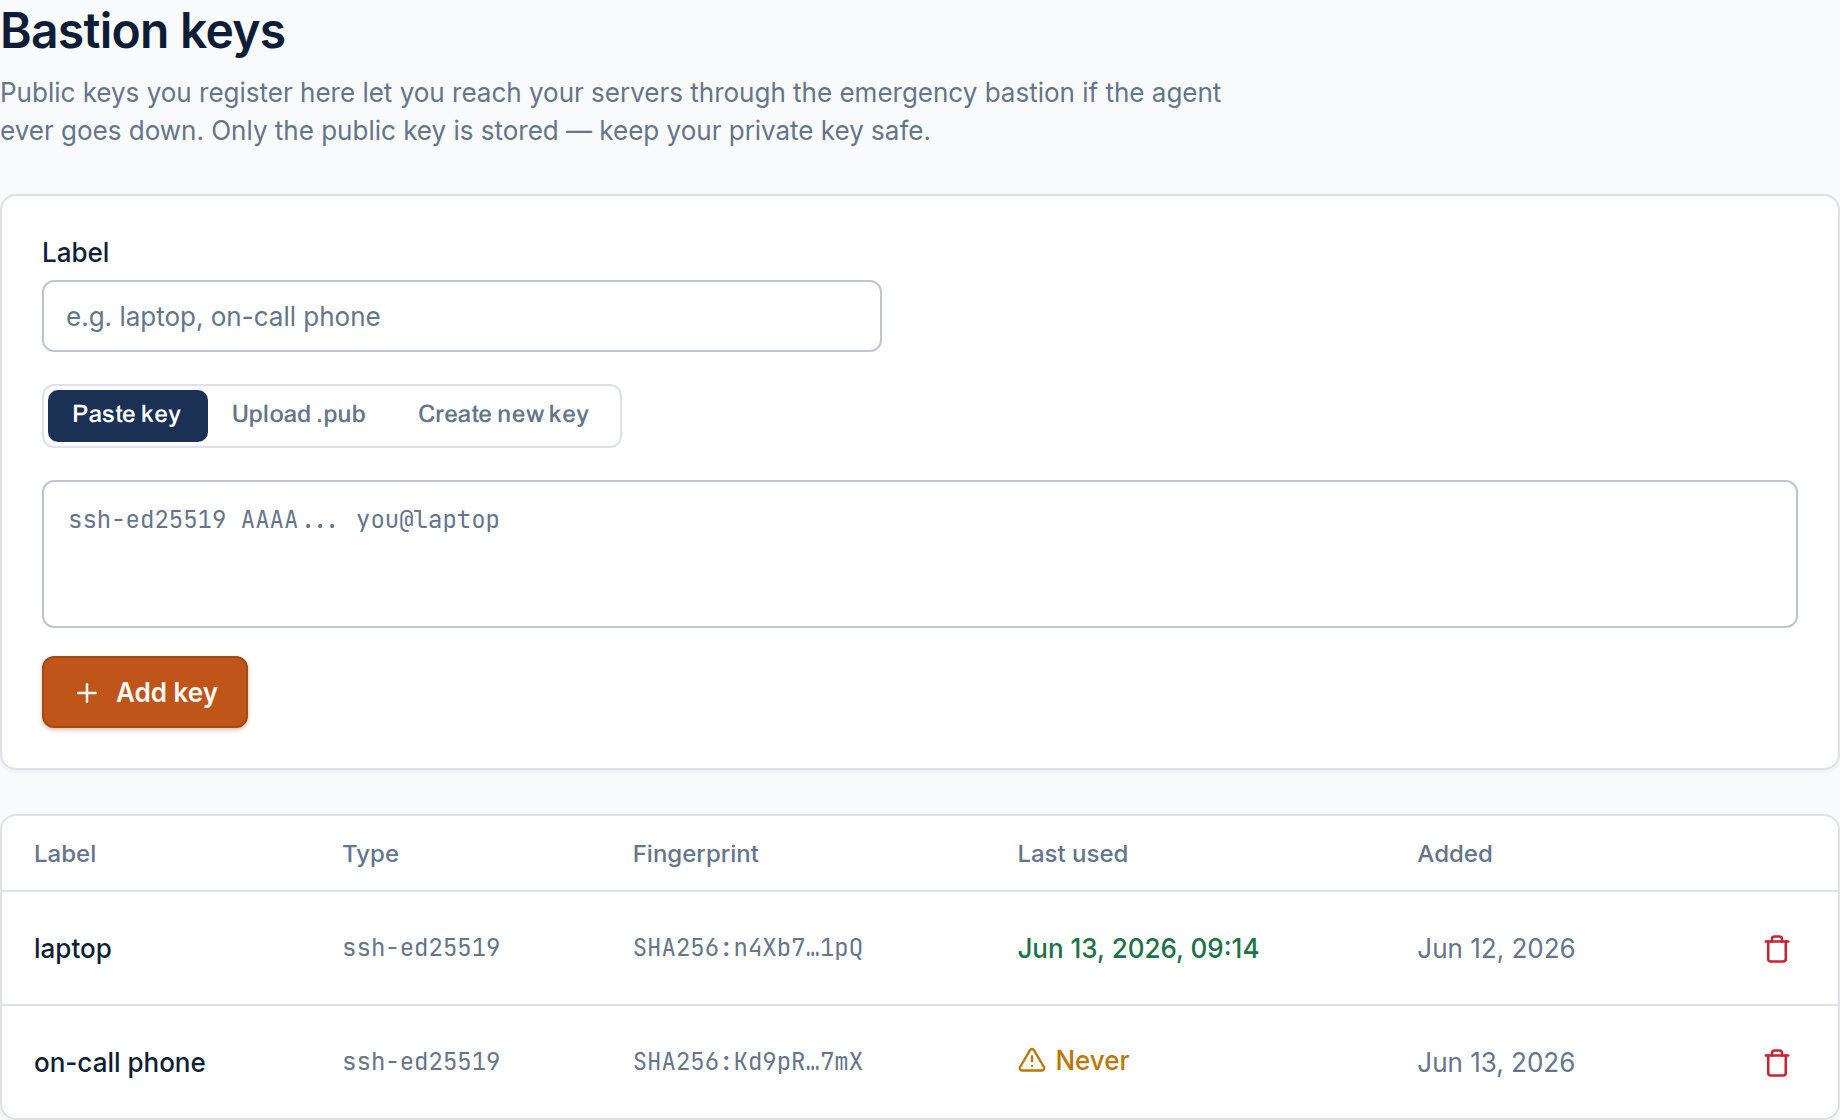
- Open Bastion keys from the sidebar.
- Give the key a Label (e.g.
laptop,on-call phone). - Choose how to add it:
- Paste key — paste an existing
ssh-ed25519 …public key. - Upload .pub — pick a
.pubfile. - Create new key — the browser generates an Ed25519 keypair for you.
- Paste key — paste an existing
If you picked Create new key, click Generate keypair. The browser makes the pair locally and shows the private key once — download it and store it safely. We never receive or keep a copy.
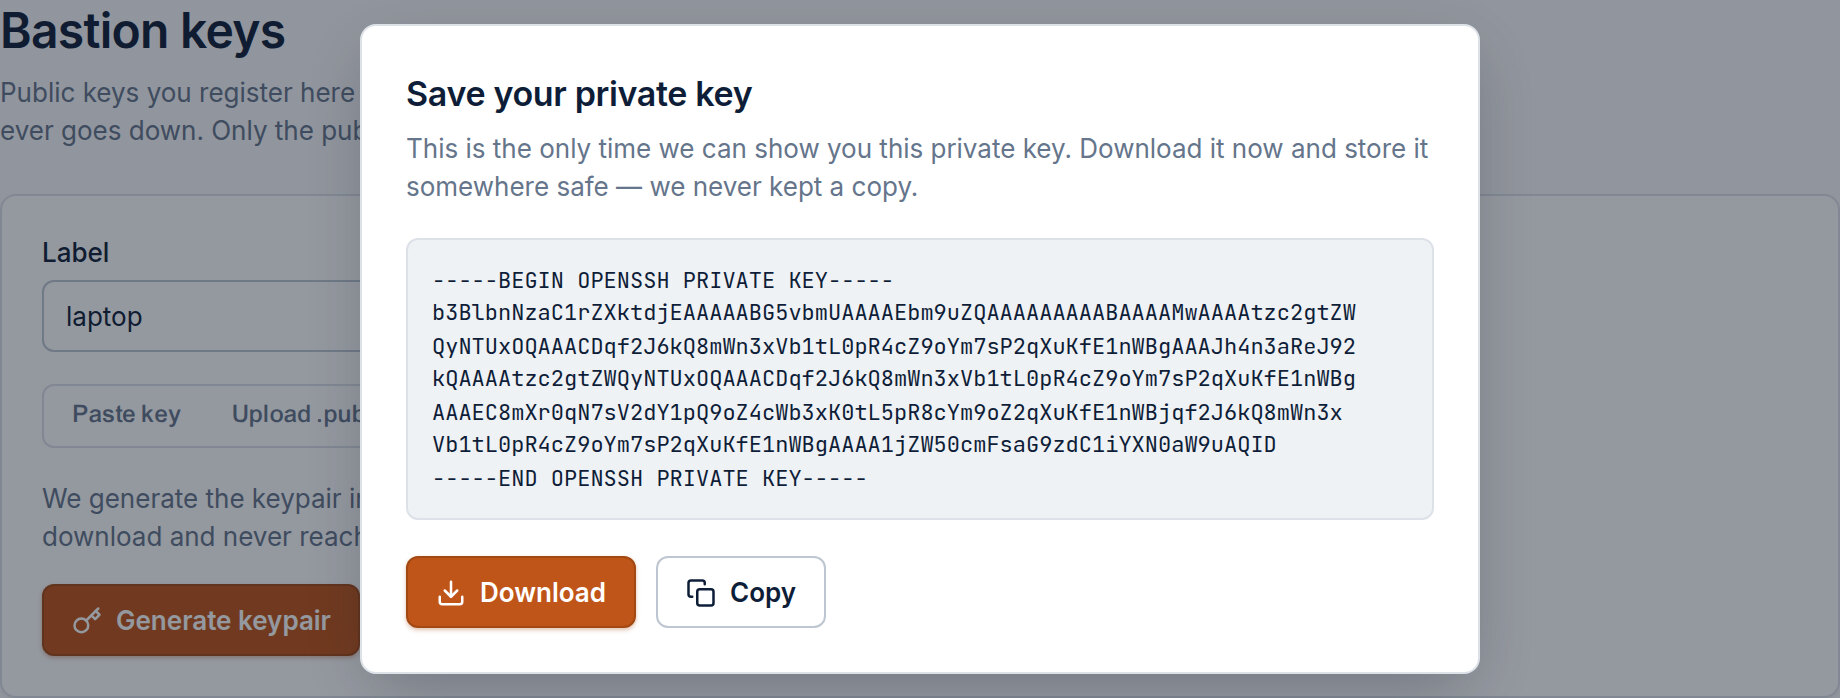
Save the downloaded file under ~/.ssh/ (for example ~/.ssh/centralhost-bastion) and lock down its
permissions:
mv ~/Downloads/laptop.pem ~/.ssh/centralhost-bastion
chmod 600 ~/.ssh/centralhost-bastion
The new key appears in the list with a Last used of Never. That’s expected — it becomes a timestamp the first time you connect through the bastion.
Step 2 — Connect over SSH
Here are the commands you use today, while port 22 is open — and the same commands routed
through the bastion. In every case the change is the same: add -J jump@b1.centralhost.sh
and swap the hostname for the server’s IP.
Connecting today (direct)
With a key:
ssh -i ~/.ssh/id_ed25519 root@server.example.com
With a password (you’re prompted after you press Enter):
ssh root@server.example.com
The same, through the bastion
With a key — -i still points at your host key; the bastion hop uses the bastion key from
Step 1:
ssh -J jump@b1.centralhost.sh -i ~/.ssh/id_ed25519 root@<server-ip>
With a password — the bastion hop still authenticates with your registered key, then the server prompts you for its password:
ssh -J jump@b1.centralhost.sh root@<server-ip>
Replace <server-ip> with the server’s IP from the dashboard. For ssh to present your bastion key
on the jump hop, make sure it’s loaded — either add it to your agent (ssh-add ~/.ssh/centralhost-bastion) or pin it per host in your SSH config (next step).
Make it permanent with ~/.ssh/config
Typing the jump flag every time gets old, and an SSH config block also lets you give each hop its own
key. Add this once to ~/.ssh/config:
Host centralhost-bastion
    HostName b1.centralhost.sh
    User jump
    IdentityFile ~/.ssh/centralhost-bastion
    IdentitiesOnly yes

Host my-server
    HostName <server-ip>          # the server's IP, never its hostname
    User root
    ProxyJump centralhost-bastion
    IdentityFile ~/.ssh/id_ed25519   # your host key; omit this line for password login
Now connecting is just:
ssh my-server
Step 3 — Transfer files with rsync
rsync runs over the same SSH transport, so the same rule applies. You hand rsync the SSH command
through -e, add the jump flag there, and target the server’s IP.
Syncing today (direct)
With a key:
rsync -avz -e "ssh -i ~/.ssh/id_ed25519" ./public/ root@server.example.com:/var/www/site/
With a password:
rsync -avz ./public/ root@server.example.com:/var/www/site/
The same, through the bastion
With a key:
rsync -avz -e "ssh -J jump@b1.centralhost.sh -i ~/.ssh/id_ed25519" ./public/ root@<server-ip>:/var/www/site/
With a password:
rsync -avz -e "ssh -J jump@b1.centralhost.sh" ./public/ root@<server-ip>:/var/www/site/
If you added the ~/.ssh/config block from Step 2, rsync inherits it — no -e needed, and you reuse
the same my-server alias (which already resolves to the IP and the right jump host):
rsync -avz ./public/ my-server:/var/www/site/
The same pattern covers scp (scp -J jump@b1.centralhost.sh file root@<server-ip>:/path/) and
IDE Remote-SSH plugins — they all read ~/.ssh/config, so once the alias works, they work.
Troubleshooting
administratively prohibited: open failed— you targeted the server by hostname instead of its IP, or the server isn’t in your account’s scope. Use the IP shown in the dashboard.Permission denied (publickey)on the jump hop — the bastion didn’t get your registered key. Confirm it’s loaded (ssh-add -l) or pinned withIdentityFile+IdentitiesOnly yesfor theHost …bastionentry, and that its fingerprint matches the one on the Bastion keys page.- It asks for a password you don’t expect — that prompt is the server (BYO auth), not the bastion. The bastion never prompts for a password; it only accepts your key.
- Still timing out on port 22 — confirm SSH is actually restricted to the bastion (Firewall · Bastion mode reads Bastion only). If it still reads Open to the world, connect directly — you don’t need the bastion yet.
- Last used still says Never — your connection didn’t reach the bastion. Re-check the jump flag and the bastion key; a successful jump flips it to a timestamp.