Connect your first server
Bring your first server under CentralHost in minutes, without touching a terminal — from the dashboard you paste the address and SSH credentials once, and we install and enroll the agent for you.
Connecting a server from the dashboard is the fastest path and the one we recommend: no commands to copy, no SSH session to run by hand. You paste the address and credentials once, click a button, and CentralHost does the rest — it installs the agent, enrolls it, and shows you live progress.
Before you start
- The server’s IP address (IPv4 or IPv6).
- SSH credentials with
rootaccess — a private key (recommended) or a password.- The server allows outbound HTTPS. No inbound ports to open.
Your first server is always free — you can complete this whole flow without entering payment details.
Step 1 — Paste the address and credentials
In the dashboard, click Add server. A two-step wizard opens. In the first step, enter the IP address and SSH port (22 by default), give it an optional alias so you recognize it in your fleet, and pick how to authenticate: password or SSH key (a key is preferred).
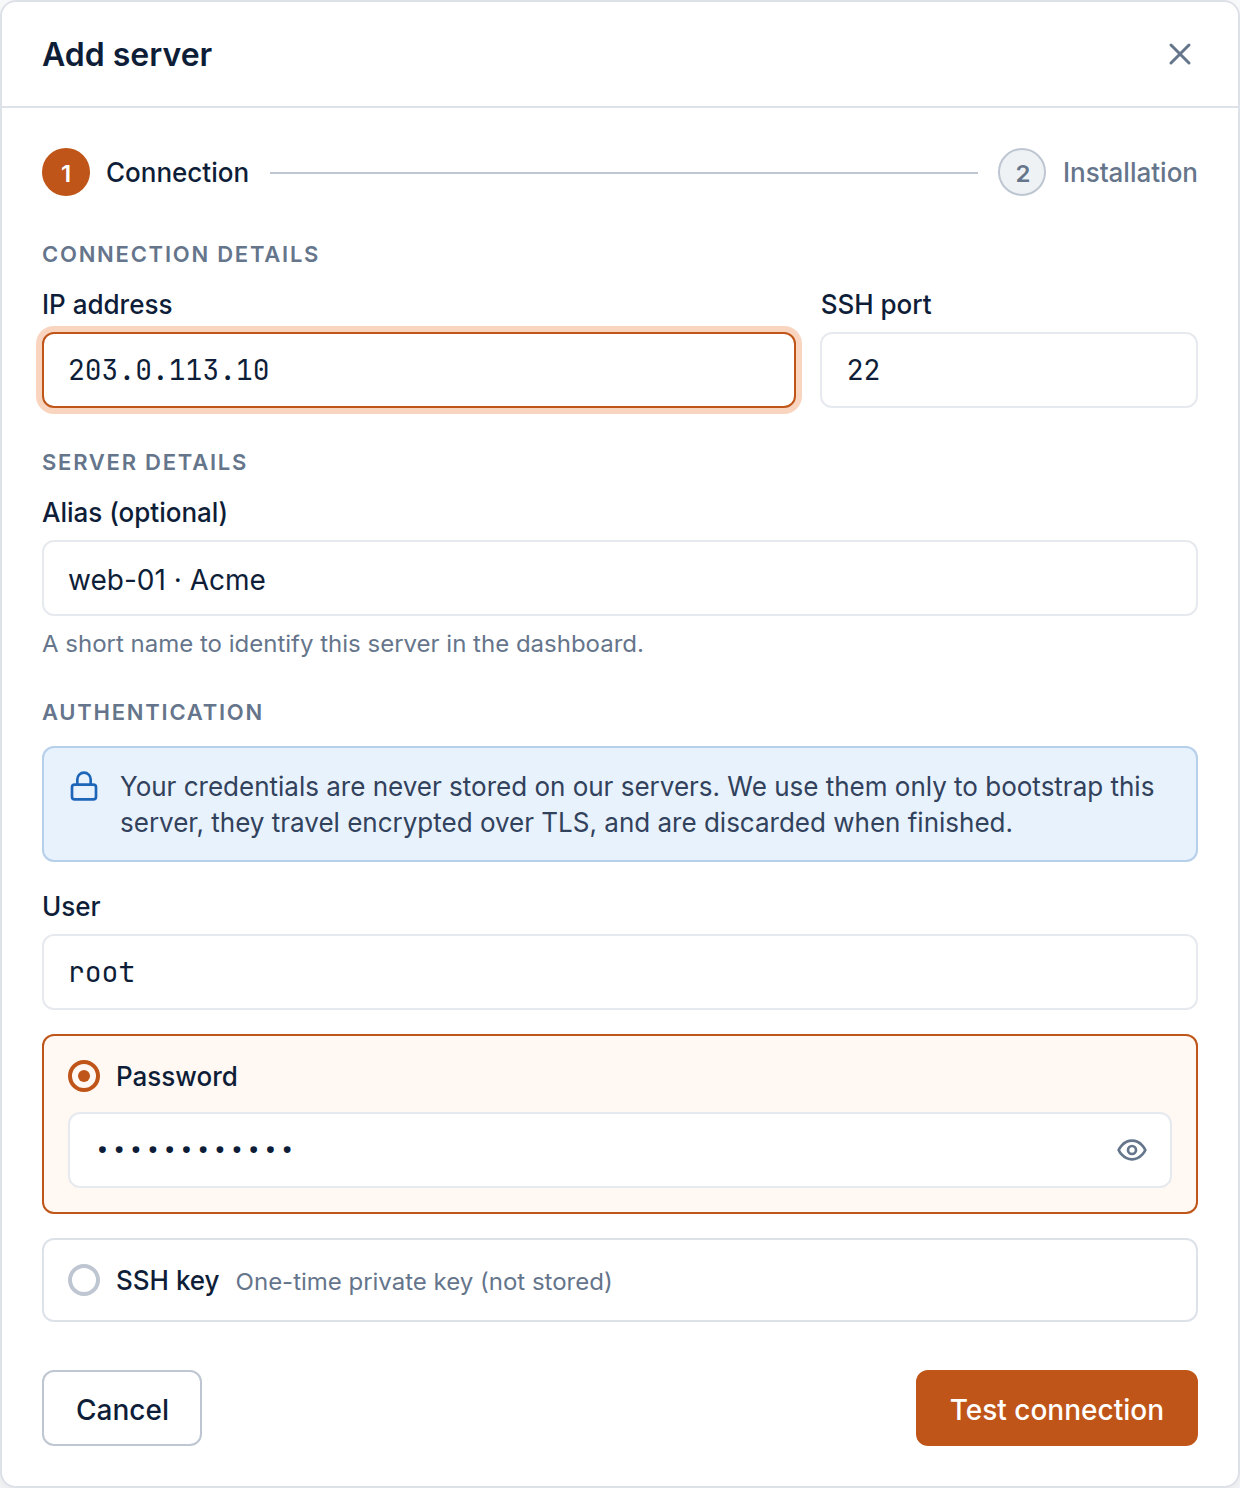
Your credentials are never stored on our servers. They’re used once to bootstrap the agent, travel encrypted over TLS, and are discarded when finished. Ongoing access then flows through the control plane — not SSH.
When the details are ready, click Test connection.
Step 2 — Verify and choose options
CentralHost connects, checks root access, and shows you what it found: the latency, the operating
system, and the host fingerprint so you can confirm it’s the right server.
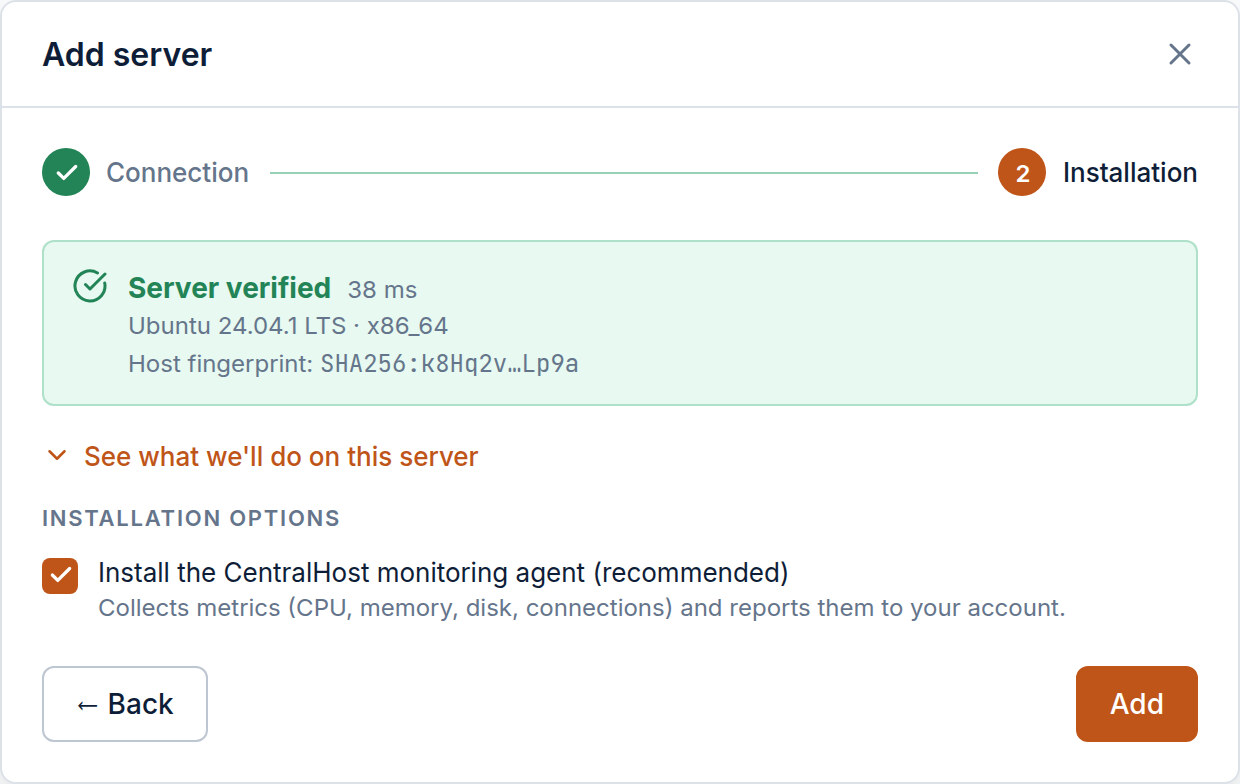
Leave the Install monitoring agent option checked (recommended) to receive CPU, memory, disk, and connection metrics. Want to know exactly what we’ll touch on the server? Expand See what we’ll do on this server. When you’re happy, click Add.
Step 3 — Watch it connect live
CentralHost installs and enrolls the agent while you watch the progress step by step, in real time. It usually finishes in under a minute.
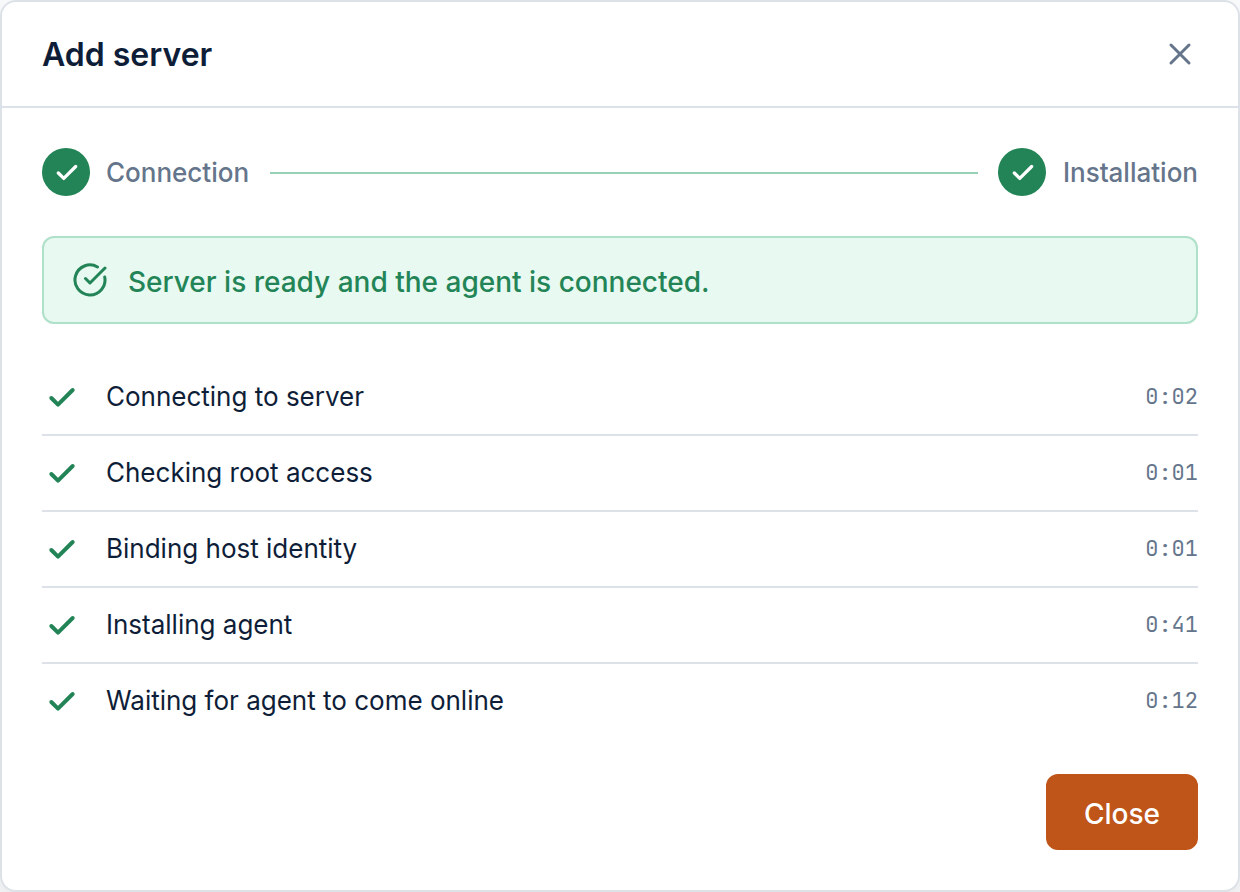
As soon as the agent makes its first check-in, you’ll see Server is ready and the agent is connected. Click Close and your server already shows up in the fleet with live status.
That’s it — no terminal, no copy-pasting commands, no ports to open. From here you can open a browser SSH terminal, run the AI Assistant, and review the server’s security posture.
What if something fails?
- Couldn’t connect — check that the IP, port, and credentials are correct and that SSH is reachable from the internet. The wizard shows the exact reason.
- The install keeps waiting for the agent — confirm the server allows outbound HTTPS; the agent needs to reach the control plane. If the bootstrap fails, the wizard offers a command to run by hand and a button to retry.